Friday, January 28, 2022

A new piece from an old adventure.

 A tribute to "Twilights Peak".

I was always fond of the octagon tower from Twilights Peak and I would often wonder if I could build my version of the tower to use in my wargames.  So here is a picture history of my build.

Here is the LBB of the adventure with my building material behind it.  A double wide box of Rice Krispies.
The cardboard from the doublewide box was very stiff compared to a single cereal box.

I first cut eight strips of cardboard each two inches by six and one half inches.  As it turned out I made a miscalculation about the building height by about 2 inches, oh well.

I then used masking tape to hold the pieces together.  

This the building with all eight pieces taped together.

I then cut a piece of cardboard two inches by five inches and glued it to opposite internal sides.

I cut a second two by five piece and glued it across this made the building take on it's octagon shape and required no more supports.
I also applied masking tape to the outer corners of the building for added strength.  I then traced out a piece for the roof then cut it out and glued it on.

These strips were half an inch wide and are going to be cut into one inch lengths.

Here are the first one hundred cardboard pieces I will use as fake bricks for the building.

Here is the first side with its faux bricks applied.

For the corner pieces I simply bend some of the cardboard pieces then glued them in place.

Yet more fake bricks and the double wide door.  Placing then gluing the almost two hundred bricks in place became quite tedious but I persevered.
I added a small raised section to the roof to match the diagrams from the adventure.  I also added a small piece to represent the chimney.
Here I began to paint the area between the bricks to help bring out the detail.

The first of eight walls painted.

Now two walls and one of two windows.  I painted the windows light blue to represent illumination from within.

Three walls.

Now four walls and the second window.  As you can see I had some trouble with keeping the spacing perfect but to paraphrase Mel Brooks "I'm working with cardboard here!"

Wall five and the double door.

Wall six.

Wall seven.

And finally wall eight.

I glued some black flock onto the lower roof section to make it look like most flat roofs in use today.

Now some 15mm figures for scale.

The building is five inches wide and six and one half inches tall.  

Here is a view of the two windows.

And now a close up of the roof.

This was interesting to build and I plan on using it in some future games and also in my Traveller comic.  This actually my second attempt to make this building the first was destroyed by a dog who I guess thought it was a chew toy.  Luckily that one was in it's early days of construction.


Saturday, April 24, 2021

Some new scenery. Dumpsters and cargo pallets.

 Cargo, the spice of adventures or something to make a wargame look better.


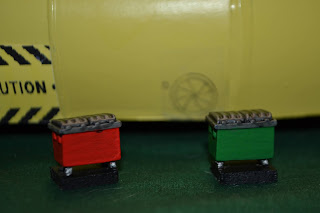
Here are a couple of dumpsters waiting outside my Far Trader to be used.  They are from Khurasan Miniatures.  Here is their link. https://khurasanminiatures.tripod.com/

Now the back side of the same dumpsters showing hinge detail.

Here are two of the pallets I made from some MDF bases I cut to fit on the beds of my transport vehicles.  The crates on the pallets are also from Khurasan.

Two more pallets.  The crates on the left pallet are from CP Models.
Link https://cpmodels.co.uk/

Left pallet Khurasan left CP.

And the last two pallets, left from Khurasan and the right CP Models.

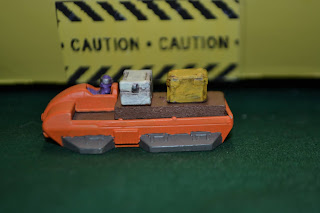
Here I have placed one of the pallets on a hover truck from Old Crow.  I do not think they are still in business but here is their link http://www.oldcrowmodels.co.uk/index.htm

Another pallet on a grav truck also from Old Crow.


I made these pallets to add both some color and detail to the games I run.  I think they make a great addition to the scenery to what ever scenario I come up with.  I feel I can use them as scenery or objectives.


Saturday, November 28, 2020

Far Trader done!

Here are some pictures of the final build and paint of my Far Trader.
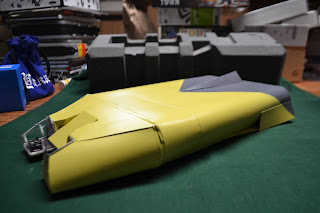
Here is the starboard side of the Far Trader with the main paint job done

The aft view.  The thrusters are not yet painted.

Here is the port side.

Now the bow end.  The windows are not yet finished.

An angle shot.

A close up of the cockpit with a tile floor and a computer wall with a sliding door in the center.

A view of the captains cabin with a tile floor and a scene of some alien world on the back wall.

I placed two 15mm figures on the cockpit floor to show scale.

And another figure in the captains cabin.

I added chairs and a console for some visual detail on the bridge.  Those pieces are from RAFM.

I added the window wire to both the captains cabin and the bridge.  I didn't cover with clear plastic because that always seems to yellow over time.

A view from the front.

A close up of the finished cockpit.

In the captains cabin I added a meeting table and two sets of benches.  The table was made from cardboard and painted brown.

Here is a view of the almost finished ship.

A view of the painted thrusters.

Another view of the thrusters.

And another view.

Now with some 15mm figures for scale.

Here my hand drawn deckplans next to the Far Trader.

Now an overhead view of two Far Traders.  The one on the left was made by RAFM during The New Era edition of Traveller.

Here is a picture of the cargo door and the starboard side iris valve.  The cargo door was printed on index card stock then glued onto the side of the ship.  The iris valve took a few more steps.  First I copied the iris valve drawing from Traders and Gunboats, then I printed it onto a used label sheet.  I then pressed a clear adhesive tape strip onto the printed iris valve.  Waited a bit, peeled it off the label paper.  The image transferred onto the tape then I simply put the tape onto the ship.

Now the other side.  I had tried to remove the tape and leave the valve image but most of the ink stayed on the tape so I left the tape in place.  This way the tape keeps the valve image protected.

I have a couple of turrets I may yet use but they really don't match the aesthetic of the ship so I will keep looking for a better match.

My next build will be the Subsidized Merchant.  The difficult part of that build will be the launch.